Guideline for creating an OSM extract for HDX (using the automated osm2hdx tool)
- CJ Hendrix
Owned by CJ Hendrix
Regions to create
The priority and status of countries to create as regions in the tool are given here.
Workflow
The ideal workflow is to
- Create the datasets on HDX (using the guideline below) with the datasets set to 'private' (see 'check boxes' below). This avoids having empty datasets visible on HDX while the first extracts are being created.
- Once the export tool has finished, check the datasets on HDX. There should be a geopreview at the top of each dataset with red vectors displayed. Note that the building vectors are not visible until you zoomed in significantly.
- Use the Admin UI to set the datasets to public. Do not set them to public using the HDX interface as this setting will be over-written the next time the export is executed.
Guidelines
- Dataset name (title as seen on the HDX dataset page) should be
HOTOSM [short version of country or region name].- If the region being created is a country/territory in this list, then please use the short name found in the list.
- If the region being created is not found in the above list (i.e. it is a sub-national or multi-national region), then use a short but clear name in common use like "Lake Chad Basin" or "Sahel".
- An additional slug for the theme (roads, waterways, etc) and "(OpenStreetMap Export)" will be automatically appended.
- Example: If you input
HOTOSM Senegal, one of the output datasets will beHOTOSM Senegal Roads (OpenStreetMap Export)
- Dataset prefix (URL slug) should be
hotosm-[iso3 code or region name]Use the iso 3 code in this list. Use underscores to separate words.
- An additional slug for the theme (roads, waterways, etc) will be automatically appended.
- Example: if you input
hotosm-fra, one of the output datasets will be at the url.../hotosm-fra-roads
- Feature selection. Unless you are sure, please use the default feature selection YAML that is automatically populated.
- Extra notes. Please do not populate this field unless you are sure. It is normally left empty.
- Locations. Enter any locations that are fully or partially included in the boundary. However, do not include adjacent areas that are part of the buffer around a selection region. For example, if you are using the national boundary of Ethiopa and buffering it (see "Check Boxes" below), you would only enter "Ethiopia" in this field, not any of the neighboring countries.
- Check boxes. Datasets should normally be public unless you want to test the output first and make it public later. Extracts should always be subnational. Buffer if using a national boundary (or other admin unit) to define the region. This ensures that the desired region is completely covered.
- Schedule. Schedule should usually be set to monthly. If you are creating a region for a new emergency, weekly or daily can be selected.
- Output file formats. All four output formats should be selected.
- Check the output box! The output box should list 4 output datasets: buildings, roads, waterways, points of interest
- Region definition.
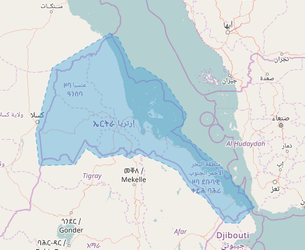
- You can draw your region in the tool. This is general the best option especially if there are many islands along a coastline. There is no need to precisely follow the boundary. Here is an example:
- If you are using a shapefile as your source:
- make sure the data is in GCS WGS84
- multipart polygons are ok
the ogr2ogr commands to convert to geojson and simplify are:
`ogr2ogr -f "geojson" output_file_name.geojson input_file_name.shp -lco COORDINATE_PRECISION=5`
`ogr2ogr -f "geojson" output_file_name.geojson input_file_name.geojson -simplify 0.001
If you are using an admin boundary of some kind to define the region, be sure to check the "buffer" check box.
- You can draw your region in the tool. This is general the best option especially if there are many islands along a coastline. There is no need to precisely follow the boundary. Here is an example: